

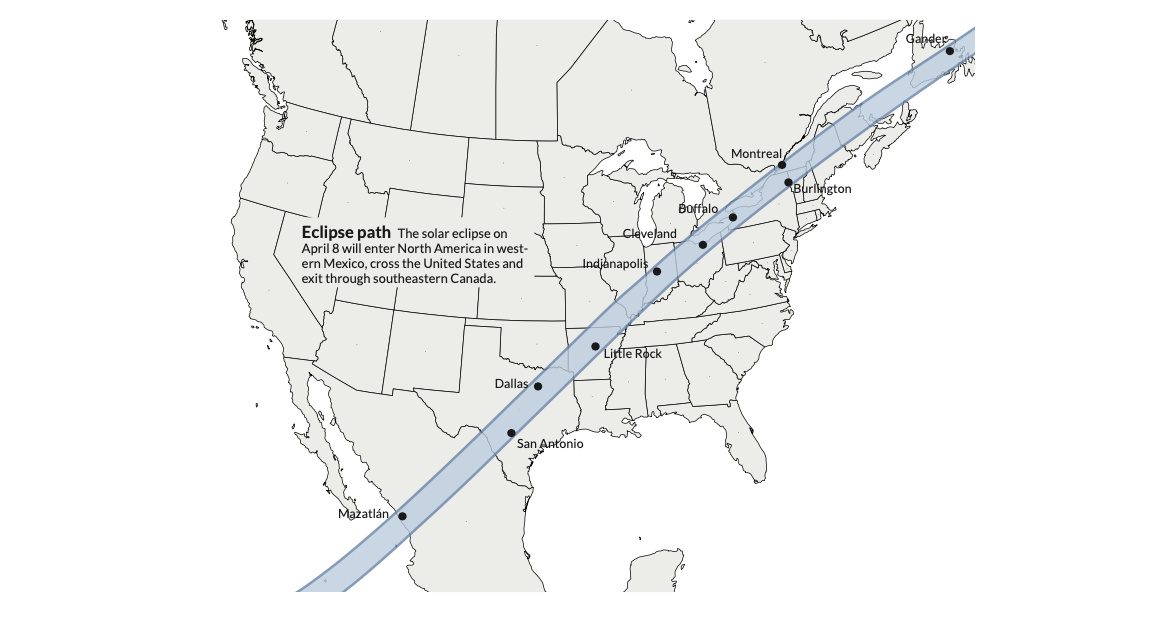
In case you haven`t heard, there is a complete solar eclipse happening on April 8th and it can be seen in many of the most populated regions across North America, from Mazatlán in Mexico to St. John’s in Newfoundland. If you have never experienced witnessing this phenomenon, it is often on people`s bucket list and is certainly worth seeing if you happen to live in close proximity to its path of totality (and can also get that Monday off work!).
Every total solar eclipse is different which is why there are legions of eclipse chasers who try and see each one by travelling across the globe. They occur about once every 18 months, but since most of the planet is water, they will often occur only over the oceans making it very difficult and expensive to see those apparitions. The next one to occur in North America (and only in limited areas of the western part of the continent) will be in 2044, and I might not be around.
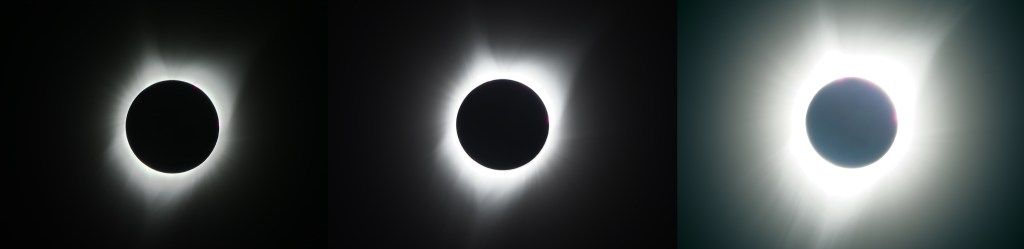
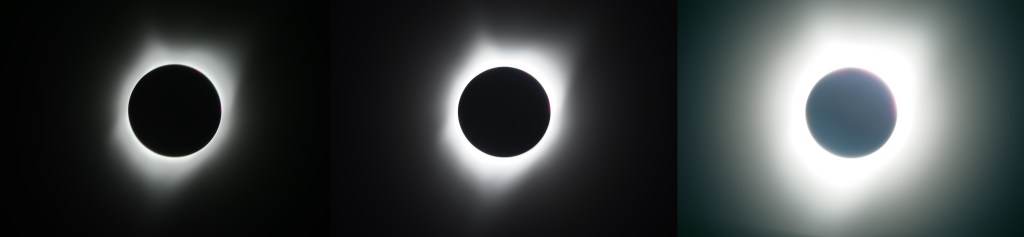
The 2024 total solar eclipse will be unusual for two reasons. The moon will be relatively close to the Earth in April causing totality to occur for 4.5 minutes (although for us Canadians, the length will be down to about 3 and a half minutes). This is two minutes longer that the Great American Eclipse of 2017, which I attended. The Sun will also be close to its peak of solar activity so there could be multiple plasma containing prominences projecting from the solar surface and visible along the perimeter of the Moon. Unlike 2017 however, the Sun will not be at its peak height in the sky but descending into midafternoon in April so not the optimal position for best photography. And April tends to be a very cloudy and rainy month, so check the forecast in the days leading up to the event because it might very well be a blow out.

I used a phone app to change the shutter speeds and trigger the shutter release without touching the body and disturbing the tracking mount. I’m sure there are better apps availabIe today that can be preprogrammed to entirely automate this procedure and allow the individual to enjoy the eclipse experience. In 2017, I used the Olympus EM-1.2 at base ISO 200 and shot at 1/4, 1/100 and 1/400 of a second shutter speeds to capture the entire dynamic range of the corona. Multiple exposures were captured at each shutter speed and stacked to improve S:N response. You can use software called Nebulosity by Craig Stark which is now available in the public domain.
The processing of all this data follows the technique first published by Fred Espenak in 2000. Fred is an astrophysicist well known for his singular focus on solar eclipses and was a frequent contributor to Sky & Telescope magazine.
.

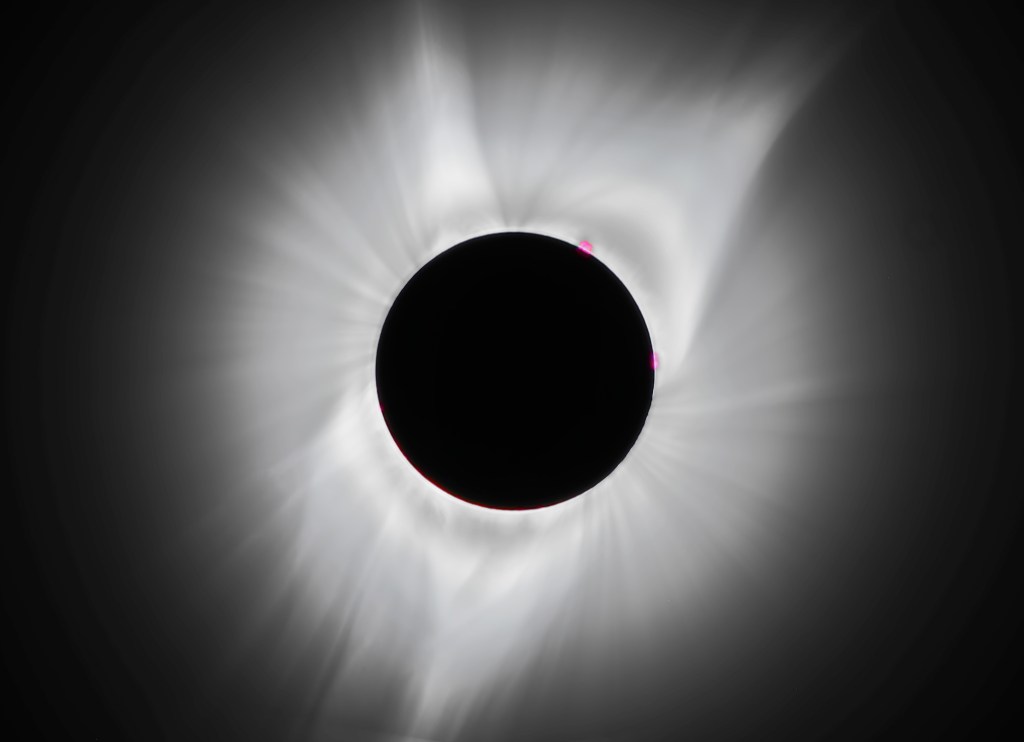
It is perfectly safe to shoot the eclipse during full totality with no filter. It is also safe to look at it at this point with your naked eye. In fact you won’t see anything unless you remove your eclipse glasses and solar filters off your camera. But as soon as Totality is over, filters must go back in place to prevent permanent damage to your camera sensor and your eye.
